How to create a new ansible role

I’ve recently started playing with ansible so I’ve just barely got the basics of this automation technology. I’ve previously used Chef or Saltstack but, this is something new for me. In today’s article I’ll show you how to create a new ansible role. Roles are somehow like Chef cookbooks because they provide all the needed information such as attributes, handles, tasks, etc. to install and configure a particular application.

To create a new role with ansible simply use the ansible-galaxy init role_name command. Note that if you are behind a firewall and cannot access the ansible api server from within your network, you can use the –offline option to create the role locally:

ansible-galaxy init apache –offline

ansible-galaxy command

ansible-galaxy command

Note that right now a directory tree has been created in the specified role. I’ve used  the find command to list all dirs:

[root@chefserver apache]# find -type d -exec ls -d1 {} \;
.
./templates
./vars
./tasks
./defaults
./files
./meta
./handlers
./tests

You can also use the tree command which must be installed if you are using the CentOS minimal image:

[root@chefserver roles]# tree apache/
apache/
├── defaults
│   └── main.yml
├── files
├── handlers
│   └── main.yml
├── meta
│   └── main.yml
├── README.md
├── tasks
│   └── main.yml
├── templates
├── tests
│   ├── inventory
│   └── test.yml
└── vars
└── main.yml

8 directories, 8 files

Each directory has a specific functionality within the role as follows:

defaults – location for the default variable for your role. I’m still new with ansible variable precedence but, I’ve learned so far that variable defined in the defaults directory of a role can be easily overwritten because they have the lowest priority. This is where you define a variable value just in case there is none defined when the role is called.
files – this is where you store any file that must be copied on the destination machine. Within this directory you can store any files such as configuration files, rpm packages. Note that files stored within this directory cannot be modified as templates so usually they are just copied to the destination machines.
handlers – notify directives within ansible tasks usually interact with system services. Within the handlers directory you store any definition for System services.
meta – role dependencies are stored within the meta directory. It also hosts other information for a specific role such as the author of the role, the description, company name, license, minimum ansible version, supported platforms, categories.
tasks – installation and configuration actions for that specific role
templates – location for ansible templates. These are files that are written in Jinja2 templating language and can be modified as the machine is provisioned. Note that you can customize a template for any structure or configuration needed.
teststhis is where you would place any verification mechanism for the results of your role
vars – directory used to store variables for the role. Variable stored here have higher priority than those stored on the defaults directory.

Changing timezone on CentOS7

CentOS7 gets shipped with the timedatectl tool which can be used to display/modify timezone settings on the server. There are several options available with this command and you can explore its man page to find out more information.

To list all available timezones, use the timedatectl list-timezones command

Since there are a lot of timezones available, you can use grep command and further filter them: timedatectl list-timezones | grep Europe

Once you’ve chosen a timezone, use timedatectl with the set-timezone parameter to set a particular timezone on your machine:

timedatectl set-timezone Europe/Bucharest

You can view timezone information by typing timedatectl:

timezones

Get timezone information on CentOS7

Now if you check out the /etc/localtime file, you will see that it’s actually a symbolic link pointing to the new configured  timezone:

ls -l /etc/localtime 

setlocaltime

CentOS timezone

As you can see from the image above, the symlink is pointing to /usr/share/zoneinfo/. If you explore this folder you will see that it contains a directory structure for each locale:

zoneinfo

Linux timezone

timedatectl set-timezone command actually creates a that specific symbolic link so you can simply create it manually instead of using this command. So first remove the localtime file and then execute the following command:

ln -s /usr/share/zoneinfo/US/Eastern localtime

In this case the timezone will be changed to US/Eastern so now if we execute timedatectl, you’ll see that the change was made successfully:

datetime

How to change timezone on CentOS

TZ environment variable is used to determine local timezone on a machine. If a system is well configured and the timezone is correctly set, it would not be necessary to manually configure this environment variable. If you have applications that use it specifically or you have an environment which requires TZ to be set, then, you would need to export it.

Note that tzselect command is available in Centos7 so if you want to change the TZ environment variable you can use this command or export directly the desired value as seen in the following example:

export TZ=:/usr/share/zoneinfo/Europe/London

Changing System locales:

Locales are a method in which a computer is assigned the language, country and codeset for its System.

locales

Linux system locales

With locale -a command you can view all locales that are available to you. If you want to change your locale you can export the following two environment variables with the desired locales:

$ export LANG=en_GB.UTF-8
$ export LC_ALL=en_GB.UTF-8

Note that these will not be persistent changes and you’ll have to add them to your
~/.bashrc or /etc/profile files to make them permanent.

Working with SElinux booleans

SElinux booleans are on/off switches that can be easily disabled or enabled if required. I’ll try to show you in this article how you can interact with SElinux booleans on a Linux machine. Note that for this demonstration I will be using a CentOS 6 Virtual Machine.

To view a detailed list of available selinux booleans you would type getsebool -a command, which will display something like:

selinux

SElinux booleans

Let’s say you have an Apache web server and you want to check out what SElinux modules are available within the OS. Since there are a lot of available booleans, we can refine this search by typing getsebool -a | grep httpd to list only the available Apache booleans. Each boolean has a distinctive role within the OS and will enable a particular access for the Apache web server. I’m not going to discuss about them now but, you can read further here.

To enable a SElinux boolean simply execute the  setsebool boolean_name on/off command, just like in the following example:

setsebool httpd_enable_homedirs on

Using the same command but with the off switch will disable the boolean:

setsebool httpd_enable_homedirs off

Note that these changes are not persistent unless you use the -P parameter and will disappear once you reboot the machine. So this is how you would make a persistent change:

setsebool -P httpd_mod_auth_pam on
setsebool -P httpd_enable_homedirs on
The first time you activate a boolean that’s not enabled by default, a file named booleans.local will be created on the machine, which contains the enabled booleans. You can view the content of this file in  /etc/selinux/targeted/modules/active/booleans.local .Note that if you modify this file manually,  you will not create any changes to SElinux since this file is created for users and it’s not used to enable/disable booleans:
boolean

Selinux enabled booleans file

SElinux will normally point you to the right command if there are some issues logged in the audit file. Literally, it will actually show you the exact command that you have to execute to fix your issues. So if you have any booleans that needs enabled, just check out the audit or the messages files to get an idea on what needs to be configured.

How to create SElinux policy

SElinux is a security mechanism introduced in Linux OS as an extra security layer. There are probably many things to be mentioned about selinux so I’m not going to discuss about the main concepts that make up selinux such as labeling and targeting. I’ll show you in this article how to create a new selinux policy (also known as module) and install it on a machine.

You can check the selinux status by typing getenforce without any parameters. You can then use setenforce 0 command to change it to permissive or setenforce 1 again to enforce it:

selinux

selinux status

All SElinux messages are logged in /var/log/audit/audit.log, you can inspect this file to determine what applications are blocked from interacting with the Operating System. /var/log/messages is another location in which you can find useful information about selinux logs. As you will probably see, the log file contains a bunch of information that is hard to read, you can use the audit2allow -w -a command to display a more friendlier output. This command will parse the audit.log file ( -a parameter) and then will create a friendlier output (-w parameter) that looks something like:

SElinux

selinux policy

In SElinux context all log messages are named AVC so you will see them everywhere in the audit log file.

You can view all SElinux  rejected accesses using the audit2allow -a command:

SElinux

How to create SElinux policy

This command can also be used to parse the log file then create a module that can be imported by SElinux to allow access. Execute audit2allow -a -M module_name to create a new SElinux module. I’ve named mine zabbixdiamond and placed it in my home directory. The command will create two files, one with .pp and another one with .te extension:

audit2allow -a -M zabbixdiamond

SElinux module

selinux policy files

You can view the content of the selinux module by executing cat zabbixdiamond.te command. As you can see from the image below, the module contains all the rules that are needed by SElinux to allow this particular AVC :

How to create SElinux policy

how to create selinux module

All that’s left now is to install the module using the following command: semodule -i zabbixdiamond.pp. If you encounter an error saying something that “global requirements are not met” it means that SElinux already has a module with a similar name installed on the machine so you’ll need to change its name:

How to create SElinux policy

how to install selinux module

In this case you will have to restart the procedure and create a new SElinux module with a different name. To check what modules are installed on the server use semodule -l. You can expand this command and search for a particular SElinux module with semodule -l | grep zabbixdiamond . In this way you also verify if a SElinux module has been successfully loaded in the OS.

Execute again audit2allow -a and see if the AVCs are now allowed in SElinux:

How to create SElinux policy

audit2allow command with selinux

That’s about it for this article folks, hope it will serve you well in creating SElinux policies. Wish you all the best!

Using find command to interact with files

In this short article I want to show you how you can use find to interact with files within Linux. I’ll also try to cover some of the aspects when using find with xargs command and we’ll see the difference between these two. So we’ll start by playing with some of the parameters available with the find command.

Getting files older than a X number of days and remove those

find /path/to/files -mtime +60 -exec rm {} \;

You can also use the -delete option that’s available with the find command:

find . -mtime +1 -delete

If you want to search on multiple directories but want to limit the maximum depth for the search, you would use the –maxdepth parameter, just like in the following example:

find . -maxdepth 1 -mtime +1 -exec ls {} \;

Find command allows you to search for a particular type of file, such as regular files (f), directories (d), symbolic lynk (l), character devices (c) and block devices (b):

find . -type f -maxdepth 1 -mtime +30

find . -type d -maxdepth 1 -mtime +30

You can also pipe the xargs command and achieve similar results to the ones we’ve seen in the previous examples:

find . -type f -maxdepth 1 -mtime +30 | xargs ls -al

So what’s the difference between using find . -type f -maxdepth 1 -mtime +30 -exec ls -al {} \; and find . -type f -maxdepth 1 -mtime +30 | xargs ls -al  since they both seem to have similar results:

search

find with -exec parameter vs find with xargs command

When using find with the -exec parameter, the command will actually run the rm command for each occurrence thus creating an overhead of the whole remove process. What’s important is that when interacting with a lot of files xargs is the preferred method. Why? because when executing a command with xargs, it will actually try to run a single remove command with as much files as possible as attributes. That being said, the find with -exec parameter is much slower than find piped with xargs:

find . -exec rm \{}

find . -print0 | xargs -0 rm

So how much parameters can you fit into a single xargs command? Execute the xargs –show-limits command to view the command’s limits:

xargs

Xargs command limits

Using find command with the -exec parameter:

find /path/to/junk/files -type f -mtime +30 -exec rm -f {} \;

Using find command with the xargs command:

find /path/to/junk/files -type f -mtime +30 -print0 | xargs -0 -r rm -f

How to install and configure a DHCP Server on a Linux machine

Hello dear readers,
In today’s article I will show you how to create your Linux DHCP server. DHCP or Dynamic Host Control Protocol is a service which provides IP addressing to your network devices. The difference between assigning static IPs and using a DHCP server is that the IP assignment is made without the interference of System Administrators. Using such service you also have a centralized administration point to your whole infrastructure offering an easy way to assign/change or remove an IP address from your hosts. Every network parameter can be automatically configured by the DHCP server: IP address, network mask, gateway, DNS servers, WINS server address, etc. This service works using the client-server model: the server sends messages using 67 (source) and 68 (destination) UDP port numbers while the client uses port 68 as source and port 67 as destination.
One of the main principles behind this technology is the use of “leased” addresses. This means that each client will be able to use a certain IP address only in the allotted time. Once an IP address has been assigned to a DHCP client, a lease-time duration is set. The client will contact the DHCP server periodically to “renew” it’s IP address. If for whatever reason, the DHCP server does not respond in time, the client will try to contact other DHCP servers by broadcasting a message throughout the network.
Before an IP is assigned to a workstation, several messages are exchanged between the DHCP client and the server. The following picture displays a typical DHCP process:

DHCP Client-Server model

We’ve talked previously about DHCP in this article when we’ve talked about Windows Server. From above, the whole DHCP IP assignment method looks something like this:
 1. client sends a DISCOVER message in which he tries to contact any DHCP server available on the network. This is a broadcast message that uses the UDP port 67 as destination. Unless there is DHCP-Relay configured on the network, this message will be blocked from any edge device (a router). This message can contain an IP address, the last used IP address and/or the lease time.
2. server will respond with an OFFER message that contains all the network parameters. This is also a broadcast message that uses the UDP port 68 as destination.
3. when the client chooses a certain IP configuration, it will send a REQUEST message to the DHCP server to inform that the specified IP address has been chosen. This message is received by all DHCP servers and thus, all will know that the client has received its reservation.
4. server will respond with an ACK (Acknowledge) message and the network parameters will be sent to the client.
Other types of DHCP messages that can be exchanged between the client and the server are:
Decline – the client will refuse to accept the IP allocation because this network address is used by another workstation
NACK – this type of message is sent when the server refuses to lease an IP address
Inform – when certain network parameters must be changed, the client will send an inform message to the server
Release – the client will inform the server that he doesn’t need the reservation anymore
BASIC NETWORK SETUP
For this example, I will install the DHCP server on a CentOS machine, you can choose whatever distribution you like because the config is similar. You’ll need an active Internet connection if you choose to install the DHCP service using the yum tool. To install this service from sources the story is a bit complicated and I will not talk about it right now.
To configure the network parameters, use ifconfig or ip commands:
ifconfig eth0 10.10.10.50 network 255.255.255.0
ip address add 10.10.10.50/24 dev eth0

How to configure Linux IP address

If you need to remove an IP address type ip address del 10.10.10.50/24 dev eth0 or ifconfig eth0 delete 10.10.10.50.
The default route/gateway address can be configured by typing:
route add default gw 10.10.10.1 oip route add default  via 10.10.10.1

How to configure gateway IP in Linux

 Once the network parameters have been set, we’ll need to enable the network interface by typing ifconfig eth0 up

How to enable network interface in Linux

 To disable a network interface, type ifconfig eth 0 down
We’ll need to add the DNS servers used by our DHCP server. Navigate to /etc/resolv.conf and edit the file using your favorite editor. Once you’ve opened the file, type in the following:
nameserver DNS_SERVER_IP_ADDRESS  
Add one entry per line for each DNS server’s IP address

How to configure local DNS servers in Linux

SERVER CONFIGURATION
Now you should be able to ping any website and we are ready to install the DHCP service. There are several things that you’ll need to know before we can proceed with the installation:
  • the DHCP service is called dhcpd (DHCP Daemon) and once we’ve configured it, we’ll see this process running on the server.
  • In CentOS, the DHCP config file in stored under /etc/dhcp/dhcpd.conf. We’ll need to modify this file to successfully configure our server. Note that if the installation is made from sources, this file will have to be created manually:

DHCP configuration file

 As you can see from the output, in CentOS, the configuration file is empty so we need to enter all configuration parameters manually. An example can be seen in /usr/share/doc/dhcp*/dhcpd.conf.sample. Once the configuration is finished, we can validate it using the dhcpd -t command.
To install the DHCP service, type yum install dhcp and wait for the installation to finish. If you don’t know weather your server has this service installed or not, try to install it and you’ll receive the following message:

How to install DHCP in Linux

After the installation has been successfully completed, it’s time to configure our DHCP server by editing the configuration file. Simply copy the content from /usr/share/doc/dhcp*/dhcpd.conf.sample to /etc/dhcp/dhcpd.conf. To achieve this result, type in cat /usr/share/doc/dhcp*/dhcpd.conf.sample > /etc/dhcp/dhcpd.conf
Now open the dhcpd.conf file using your favorite editor. I’ve edited the file and kept only the information that we require for this config. The file should look similar to:
authoritative;
ddns-update-style none;
option domain-name “ppscu.com”;
option domain-name-servers 10.10.10.1; 127.0.0.1
option routers 10.10.10.1
default-lease-time 600;
max-lease-time 7200;
subnet 10.10.10.0 netmask 255.255.255.0 {
  range 10.10.10.150 10.10.10.200;
    }
Note that the bold lines are the ones that must appear in the config. The # sign is used to comment lines so whatever is written after this character is not executed. It’s important to put the ; character at the end of each line.
I will try to explain each parameter used in our configuration file:
  • authoritative – an authoritative server will respond to requests coming from clients that are part of the same subnet. Simply put, if a client from a subnet that was not configured on the DHCP server requests a renew, the DHCP server will send DHCP NACK messages forcing the client to release its IP configuration.
  • ddns-update-style none – disables dynamic DNS
  • option domain-name “ppscu.com” – sets the domain name of the DHCP clients
  • option domain-name-servers 10.10.10.1 – sets the DNS servers used by clients
  • option routers 10.10.10.1 – sets the network routers
  • default-lease-time 600; and max-lease-time 7200; – the number of seconds a client can hold its IP allocation before submitting a renew
Note that if we include these settings in the subnet config, the settings will only be applied to that particular subnet. In this example we’ve configured the settings for the whole server thus all subnets configured on this machine will carry the same config.
  • subnet 10.10.10.0 netmask 255.255.255.0  – the subnet of the DHCP server
  • range 10.10.10.150 10.10.10.200; – the pool of IP addresses used by DHCP clients
After we’ve finished our configuration, it’s time to test the config file for errors by typing dhcpd -t. If there are no errors received, the dhcp daemon can be started. You can verify it’s status by typing service –status-all | grep dhcpd

Get DHCP service status 

Start the DHCP daemon by typing /sbin/service dhcpd start .You can stop it by typing: /sbin/service dhcpd stop
If you type ps -el | grep dhcpd, you should be able to see the daemon running on your server. If you have any problems with the server at this point, type service dhcpd restart to restart the DHCP daemon:

How to restart DHCP daemon

We can also check if the server listens on UDP port 67 by typing netstat -paun

how to verify DHCP port in Linux

p = display PID/Program name for sockets ; a – all ; u – show only UDP ports ; n – numeric

CLIENT CONFIGURATION
On the client side, you will need to type dhclient [interface name] to instruct the DHCP client to listen on the specified interface. After this step is complete, if you type ifconfig or ip addr show, you should be able to see the leased IP address:

how to display IP address in Linux

 The dhclient config file is stored in /etc/dhcp/dhclient.conf. By editing this file, we can set custom settings for the DHCP client:

How to configure DHCP client

 The database of the DHCP client is stored under /var/lib/dhcp/dhclient.leases
If we return on the server, we can check out the DHCP database in which leased IP addresses are stored. In CentOS, the database can be found in /var/lib/dhcpd/dhcpd.leases and looks something similar to:

DHCP database

This way we can verify what IP addresses have been leased to DHCP clients. The number of leased IP addresses can be easily viewed by typing dhcpd once the daemon has been started:

Verify DHCP leased IP addresses

If we want to reserve a specific IP for a DHCP client, we’ll need to type in the following (I’ll add comments on each line):

host ubuntu1 {   host identification within the dhcpd.conf file
        hardware ethernet 00:0c:29:bd:5b:69;   – MAC address of the host
        option domain-name-servers 10.10.10.1;   – specific DNS servers used by this host (optional)
        option routers 10.10.10.1;   – specific gateway used by the host (optional)
        fixed-address 10.10.10.160;   – host’s reserved IP address
}
Once you’ve made this configuration, restart the dhcp daemon. On the client side, we will need to disable/enable the network interface by typing ifconfig eth0 down followed by ifconfig eth0 up.
Another method of renewing the leased IP address is by typing: sudo dhclient -r eth0 followed by sudo dhclient eth0
 If there are no problems on the server, the DHCP client will renew it’s IP address:

DHCP client renew

We can further modify our dhcpd.config file to set custom settings for a group of DHCP clients by typing:
group {
option domain-name-servers 10.10.10.1; -global settings applied to this groups of hosts
option routers 10.10.10.1;
         host ubuntu1      { 00:0c:29:bd:5b:69; }   each DHCP client with it’s corresponding MAC address
         host ubuntu2      { 00:0c:29:bd:5b:70; }
         host ubuntu3      { 00:0c:29:bd:5b:71; }
}
 I’ve tried to cover all main steps that you need to take in order to install and configure DHCP on your infrastructure. We’ve seen how to deploy the DHCP server and configure a client to obtain its IP automatically. Hope I’ve managed to explain all the important steps and you now have a clear understanding of the DHCP protocol how its implemented in Linux distributions. If you have any questions don’t hesitate to post a comment and I’ll respond asap. Wish you all the best!

Running Docker images

In this article I’ll show you how to manipulate docker images and run them locally on your workstation. To pull an image from the official docker hub repository use the command docker pull image_name just like in the following example:

docker-image

how to pull docker images

Now that the image has been stored locally, you can type docker images to visualize all available local images:

docker-localimg

listing docker images

You are probably wondering where are the docker images stored. Well, they are encoded in the docker application in /var/lib/docker/devicemapper/devicemapper/data and /var/lib/docker/devicemapper/devicemapper/metadata. Note that these locations can be seen if you execute docker info command:

docker-info

get docker information

By default, the docker pull command will only download a single image so, if you need to download everything from a repository, use docker pull –all-tags rabbitmq

Now you can simply execute docker run -d rabbitmq and verify the container has been started by typing docker ps command. Remember that if you don’t use the -d parameter, the container will end its execution once you exit the terminal.

You can pull a specific docker image tag by using the same pull command just like in the following example: docker pull rabbitmq:3.6.5-management

docker-management

pull docker image tag

Note that because I’ve previously downloaded the rabbitmq base image, the download was much faster since I already had some pieces of the docker image. I’ve downloaded this specific image because it contains the rabbitmq management interface and I wanted to show you how to forward a port from a docker container to your host. This can be achieved by using the -p IP:host_port:container_port parameter. For this example I don’t need to bind that port on a specific interface so I’ll simply use the following command:

docker run -d -p 15672:15672 rabbitmq:3.6.5-management

You can then verify that the port has been opened with the netstat command:

netstat -tupln | grep 15672docker-portforwarding
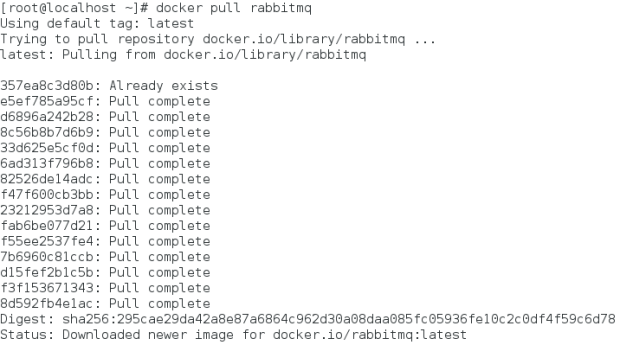
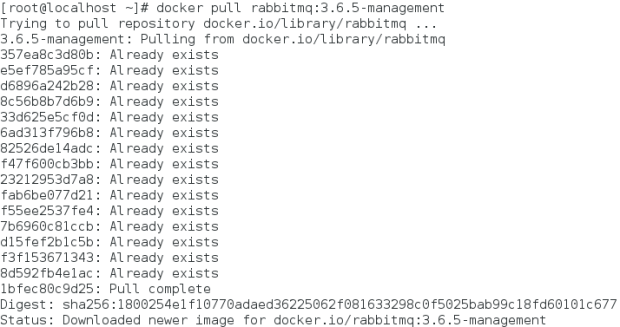
You can now open a browser and check the rabbitmq management interface on the specified port:

rabbitmq-ui

rabbitmq on docker

Manipulating images with docker is pretty simple as you’ve seen in this article. In a future article I want to cover the topic on how images are built for docker. In the meantime don’t hesitate to post a comment in the dedicated section and share it to others. Wish you all the best!

Linux processes

A process is a running program within the Operating System. A process will contain code that can be interpreted by the system processor. Because Linux and Windows use different executable structures, a program that runs on one OS cannot run on the another. A file that’s stored on the hard drive must be first loaded into RAM to be able to execute its instructions. The kernel is responsible for managing system resources and it gives control over CPU to different processes loaded into RAM. We’ve discussed previously about Linux boot process so please check out that article before proceeding further. In our days Operating Systems are multi-tasking which offers the possibility of running multiple programs at the same time. The kernel maintains a process table in which it stores information for each process such as:

  • PID or process ID – it’s a number from 0 to 65535 that uniquely identifies a process .
  • memory space –  the kernel is responsible for dividing RAM memory for each process so they do not interfere with each other.
  • UID, GID – group and user IDs determine the permissions with which a process is executed.
  • the parent process
  • the terminal on which the process is connected.
A process can spawn other processes within the System, this is called the parent process and spawned processes are also known as subprocesses or child processes. If you don’t know by now, in Linux, the init process is the first process executed when the OS is booted. init will always have the PID equal to 0 and all processes are spawned under it. When a process finishes its execution, all resources that were allocated are returned to the resource pool and in the process table the exit code of the process is loaded. If a process has successfully finished its operation, the process table will stored the value 0. When the parent process reads and acknowledges the status code, the subprocess entry is deleted from the table.

When the parent process terminates before the child process finishes its execution, the subprocess becomes an orphan process and its the registered under init which terminates its execution.
A process can have one of the following STATE:
Running – the process is running or it waits to receive access on the CPU
Waiting – the process is waiting for an event to occur or it waits for certain resources. There are two types of waiting processes:

  1. interruptible – may be interrupted by signals
  2. uninterruptible – cannot be interrupted and are dependent to hardware conditions

Stopped – the process has been stopped
Zombie – a process that’s stuck between finishing its execution and the moment it’s deleted from the process table.

Commands used to interact with System processes:

Use the ps -el command to view the current running processes:

View Linux running processes

PID – process ID
S – State
PPID – Parent process ID
TIME – how long the process has used the CPU
COMMAND – command executed by the process
There are multiple options that can be used with ps command. Check its man page or use the help paramter to view the available options. I also use ps -aux command often

 ps command supports a lot of parameters that can help you a when trying to get processes information on a Linux Operating System. I personally prefer using the -faux parameters because it will display a tree like structure with full process information:

ps -faux
processes

Linux process information

Another useful command that can be used to gather Linux process information is the top command. You can use top to view running processes, kill a specific process, view resources used by each process, sort processes by a specific criteria (CPU, Memory, PID, etc.) and many others. I think top is one of the best commands that you can use to view the overall System usage and it’s available by default in most Linux distributions.

gather Linux process information


htop and atop are two enhanced versions of top command. They are not available by default on most distributions but, you can easily install them by using the following command: yum install atop htop. I like htop a lot because it offers an interactive interface that can easily be used to manipulate processes:

htop command 

lsof or list of open files is a command that’s useful when you want to view the files opened by a certain process. lsof can be used with the -p parameter to specify a certain PID to get opened files for a specific process:

List opened files in Linux

tree and pstree are used to view a structured tree of all the processes running on the OS. I prefer using the pstree with the -Ap option:
pstree -Ap

pstree command in Linux

If you are using Linux OS on a daily basis then you are probably familiar with most of the information presented in this article. I’ve written it for those that are just beginning their Linux journey and want to learn new stuff about it. Processes play an important role within an OS so knowing how to interact with them is a must have skill. There may be other information that needs mentioned here so please post a comment if you have anything to add. Wish you all the best and stay tuned for the following articles.

Tuning and troubleshooting file systems

In this article I’ll show you how to troubleshoot and find useful information about your server’s file system. There are a lot of useful commands available on Linux distributions and some may have enhanced capabilities than the ones presented in this article. Also note that I’m not able to cover each command’s parameters and features so I’ll just make an overview image of the available utilities on Linux distributions. For this example I’ll be using a CentOS machine.

Getting information about the file system:

lsblk command can be used to display block devices, it offers a tree like structure that can be easily interpreted. With this command you can find all sort of useful information such as disk/partitions/sizes/device type and so on:

lsblk

List block devices in Linux

Another useful command is the blkid which can be used to view the UUID and the file system type of system block devices:

blockdevices

list Linux block devices ID

To find out detailed information regarding a specific partition use the dumpe2fs command. It can be used with the -h parameter to display a human friendly output:

dumpe2fs -h /dev/sda1

dumpe2fs

Get partition information on Linux machines

With tune2fs command you can change all parameters that are displayed by dumpe2fs. There are a lot of parameters supported with this tool and I’ll let you explore the man page for this command (man tune2fs ). Note that it’s not very common that you have to change file system parameters because default values work in most scenarios. I recommend playing with these parameters if you know what you’re doing or in a testing environment.

Another useful tool to troubleshoot file systems  performance is debugfs. Note that it’s best that you not use this tool on a mounted file system:

[root@localhost /boot/grub]# debugfs /dev/sda2
debugfs 1.41.12 (17-May-2010)
debugfs:

Type help to view available commands within the debugfs utility. You can achieve similar output as dumpe2fs by typing status or show_super_status. Note that debugfs can be used to change state of different file systems such as ext2, 3 ,4.

Checking inodes information:

Inodes information can be seen by using df command with the -ih parameters:

indoes

Get inode information on Linux


Debugfs command supports multiple options with which you can check and modify inode information. With lsdel you can list deleted inodes that you can later restore if needed:

lsdel

Check deleted inodes in Linux

Then you can execute undelete inode_number file to undelete an inode. This will actually restore the file if it’s respective inode is found.

You can dump all deleted inodes to a file much faster by using the following command:

echo lsdel | debugfs /dev/sda1 > deletedindoes

With the logdump -i inode_number command you can view a specific inode information. This option will dump the content of the file system journal.

dump_inode, or cat options can be used with debugfs to dump an inode to a file or to the standard output.

Note that commands presented above work only with ext2 ,ext3 and ext4 file systems. If you are using other file systems such as xfs, you have to use their dedicated tools to perform troubleshooting operations.


Running Docker containers

In this short article I’ll discuss about how you can run containers with docker.

Docker offers an easy way to search and run container images on your servers. You can simply execute docker search name to search for a particular application, just like in the following example: docker search httpd

docker-httpd

docker apache image

As you can see from the image above, we’ve searched for apache images that are available on the docker hub website. On this website you can find all sorts of images that are built by different contributors to the docker community. You can create an account yourself and build/upload/download docker images from the hub. For this article I’m going to use images directly from the hub.

For the following example I’m going to search for a centos image which I’m going to run it on my current host. So once you’ve executed docker search centos, you can then run the following command to launch the container: docker run docker.io/centos

Because we’ve simply used the run command, the docker image will be downloaded but no actual output will be shown. With the run command we can also append commands to our docker images just like in the following example:

run docker.io/centos ls -al /

docker-image

docker centos image

This is the container’s file system, as you can see it’s completely isolated from your machine’s file system. Whatever docker image you run, that specific container will only be executed in your opened terminal so it will close if you exit the terminal or end the process. Docker supports the so called detach method in which you can run containers and let them execute in background (or so called detached). This result can be easily achieved by executing docker run command with the -d parameter:

docker run -d docker.io/centos

I’ve not chosen the best image for this example because the container will be executed then it will close. In this case I can run the following command to make sure that my container will not end its process once it’s executed: docker run -d docker.io/centos sleep infinity

You can visualize the running containers by executing the docker ps command:

docker-ps

docker containers

Note that a unique container ID has been automatically assigned to our newly created container so any future interaction with the container will be made by referencing its ID.

As you can see, because I’ve used a public available image, the name of the container is set by the image author. We can change this behavior and start an image with a custom name. For now let’s stop our container by running docker stop ID just like in the following example: docker stop 424c8d3a61ce

We can verify again that the container has been stopped:

docker

how to check docker processes

To assign a custom name to a container use the docker run command with the –name parameter: docker run -d –name ittrainingday docker.io/centos sleep infinity

This is very useful if you are running multiple containers from the same docker image so make sure you assign a unique name to each container instance.

You can start/stop/pause/restart docker containers whenever it’s needed simply by using the docker action container_name_or_id command. Note that docker command supports multiple actions and parameters so make sure to check its manpage or much easier, by using docker –help.

There are many other features available with docker, I’ll try to cover some of them in future articles. Since I’m still at the beginning with this technology, any input from your is more than helpful. So please post any comments/questions in the dedicated section and I’ll try to respond as soon as possible. Wish you all the best!