In this article we’ll proceed further in our Chef12 discovery and we’ll discuss a bit about encrypted data bags. Data bags are used to store sensitive information that must not be accessed by unauthorized users such as passwords or certificates. Whatever secret information you want to use in your Chef cookbooks, it’s best that you stored them safely encrypted in a data bag. For this demonstration we’ll create a data bag in which we’ll store the credentials of our Zabbix server.
Before we create the data bag we need to generate the secret file that will be used to encrypt the data bag by using the following command:
openssl rand -base64 512 | tr -d ‘\r\n’ > encrypted_databag_secret
This command will create a new file in the current location and it’s recommended that you set the 400 (owner read only) permissions on it:
chmod 400 encrypted_databag_secret
Now it’s time to create the data bag by using the following command:
[root@Centos06-1 passwords]# knife data bag create passwords
Created data_bag[passwords]
In our data bag we’ll store the credentials for our Zabbix server so we need to proceed with the following:
- Generate a strong password using the following command:
[root@Centos06-1 passwords]# openssl rand -base64 32
fxEk31+tfD0PNZI/u/k5SaXlsO47H90BZw2qSo7pl3Q=
- Create a new json file named zabbix.json and add the following lines:
{
“id”: “zabbix”,
“username”: “zabbix”,
“password”: “lCb+Y84iOzv1SWJpSkTYDG7naSzKCqihFTJGqkjDyXE=”
}
the “id” is a mandatory field which represents the data bag name
- Once the data bag file is created we need to encrypt and upload it on the Chef 12 server. To achieve this result use the knife data bag from file command:
[root@Centos06-1 passwords]# knife data bag from file passwords zabbix.json –secret-file /etc/chef/encrypted_databag_secret
Updated data_bag_item[passwords::zabbix]
Note that we’ve used the previously created secret file to encrypt the data bag (using the –secret-file parameter).
Now that the encrypted data bag has been created, we can use the following command to verify the configuration:
knife data bag show passwords zabbix
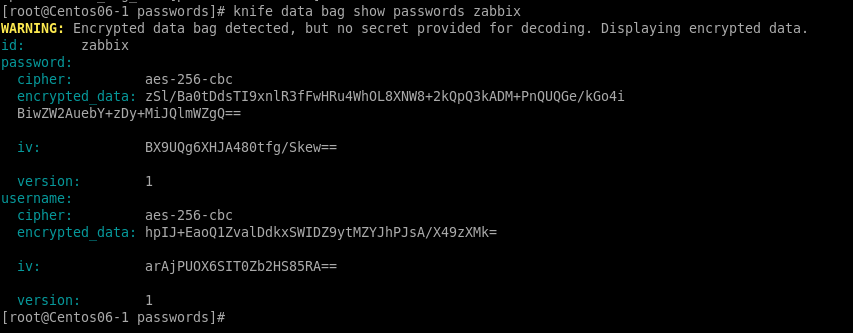
Chef encrypted data bag
Note that the data bag is encrypted, to visualize the clear text content of the data bag execute the following command:
knife data bag show passwords zabbix –secret-file /etc/chef/encrypted_databag_secret

Display encrypted data bag content
The encrypted data bag was created on the server but, on your local repository it’s still stored in clear text. To encrypt the local data bag as well use the same command used previously and add the -z parameter, as follows:
[root@Centos06-1 passwords]# knife data bag from file passwords zabbix.json –secret-file /etc/chef/encrypted_databag_secret -z
Updated data_bag_item[passwords::zabbix]
That’s about it for this article folks, we’ve created an encrypted data bag in our Chef 12 with the credentials of our Zabbix Server. If you have any questions on this topic don’t hesitate to post a comment in my dedicated section and I’ll respond asap. Wish you all the best and stay tuned for the following articles from IT training day.
